
Whether you’ve tried watercolours before, or if this is your very first time, take a moment to get to know your colour palette and materials.
Remember, these instructions are meant to be friendly suggestions, not rigid rules. Watercolours have a personality of their own, so no two paintings can ever be exactly alike. Explore your own artistic style and enjoy the creative process!
-
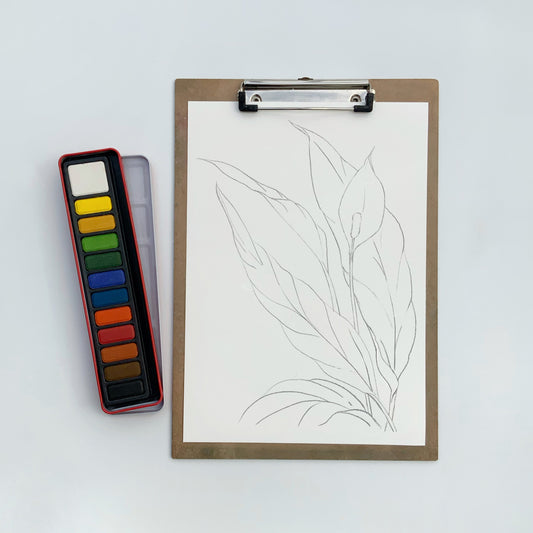
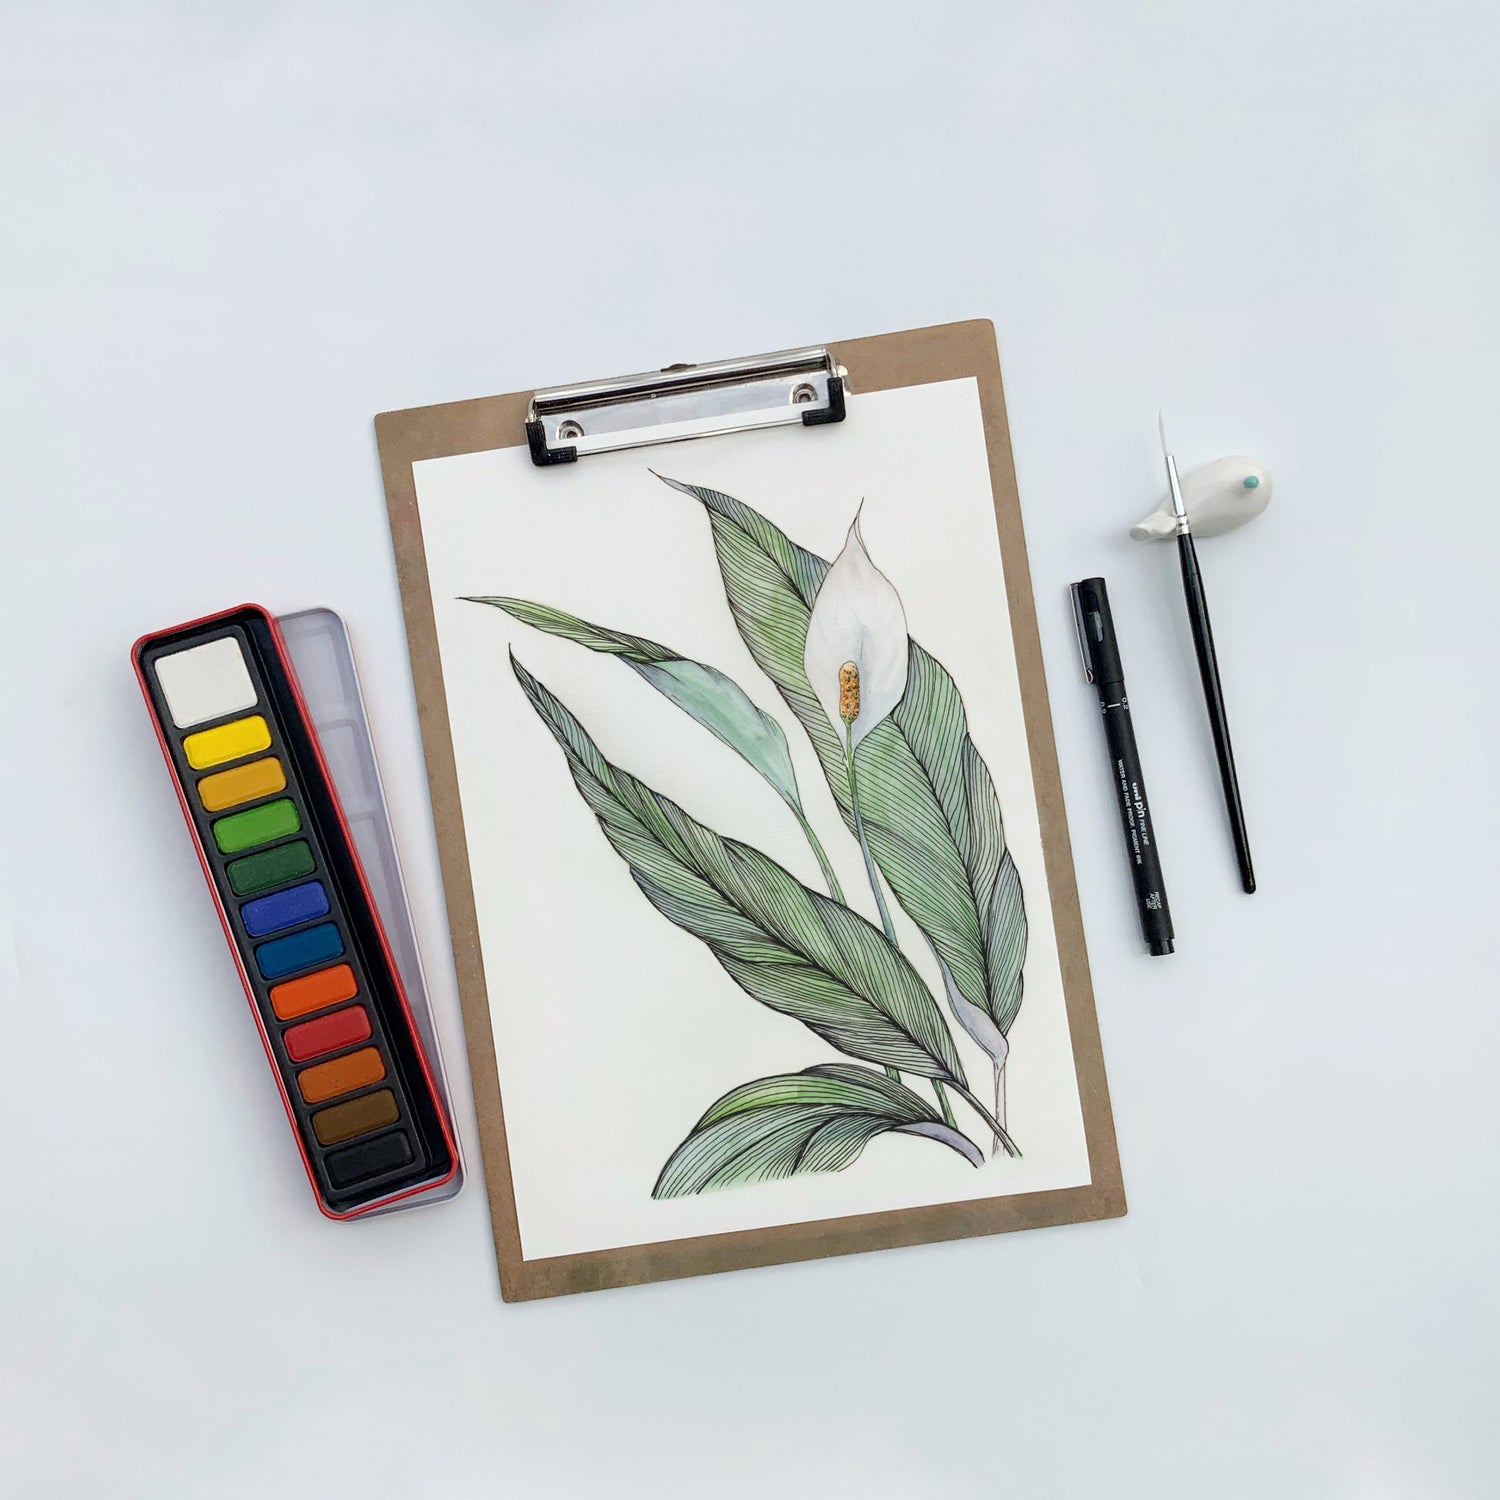
Your kit includes
- A sketch of the design
- Test design to experiment & test your colours
- Waterproof fine liner pen
- Watercolour set
- Brush size 6
-
You'll also need
- A cup (or jar) of water
- A sheet of kitchen roll
- Your good mood
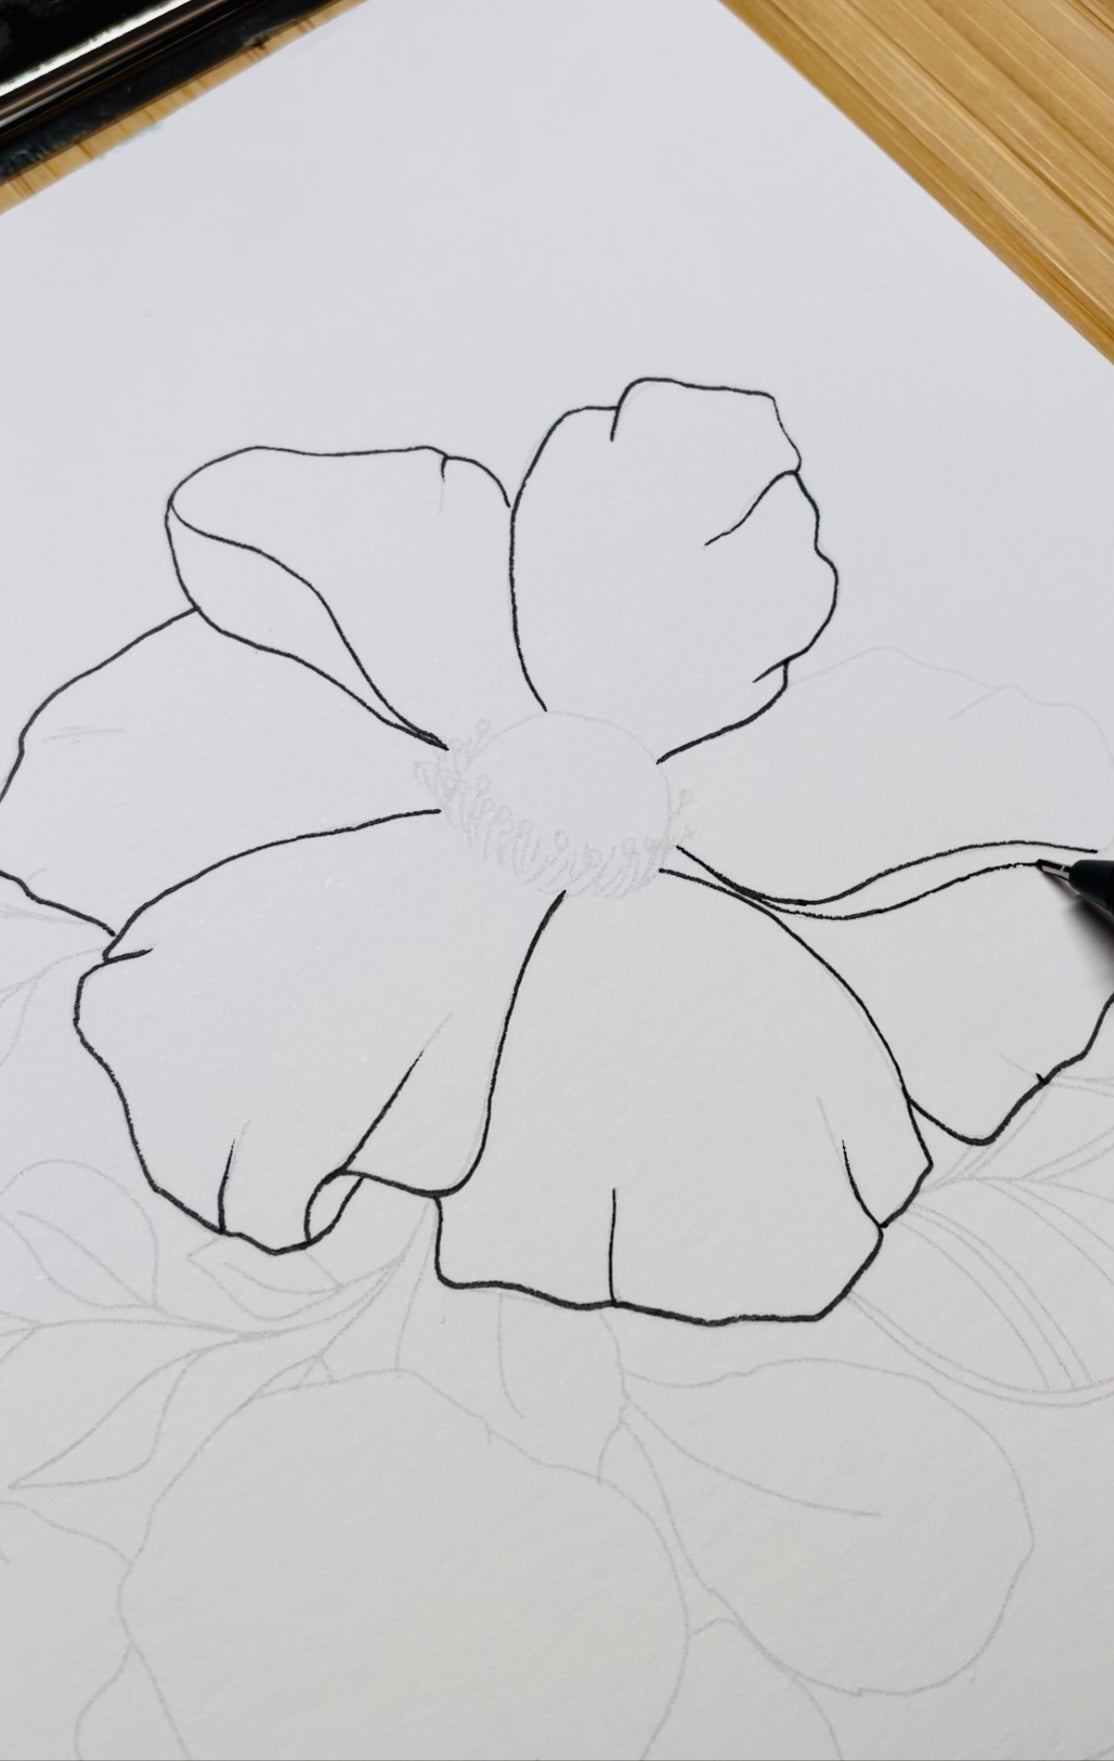
1. Warm-up with Your Pen
Use the waterproof pen to trace the flower outlines. This is just to get you started – the lines won't smudge when you add watercolours later.
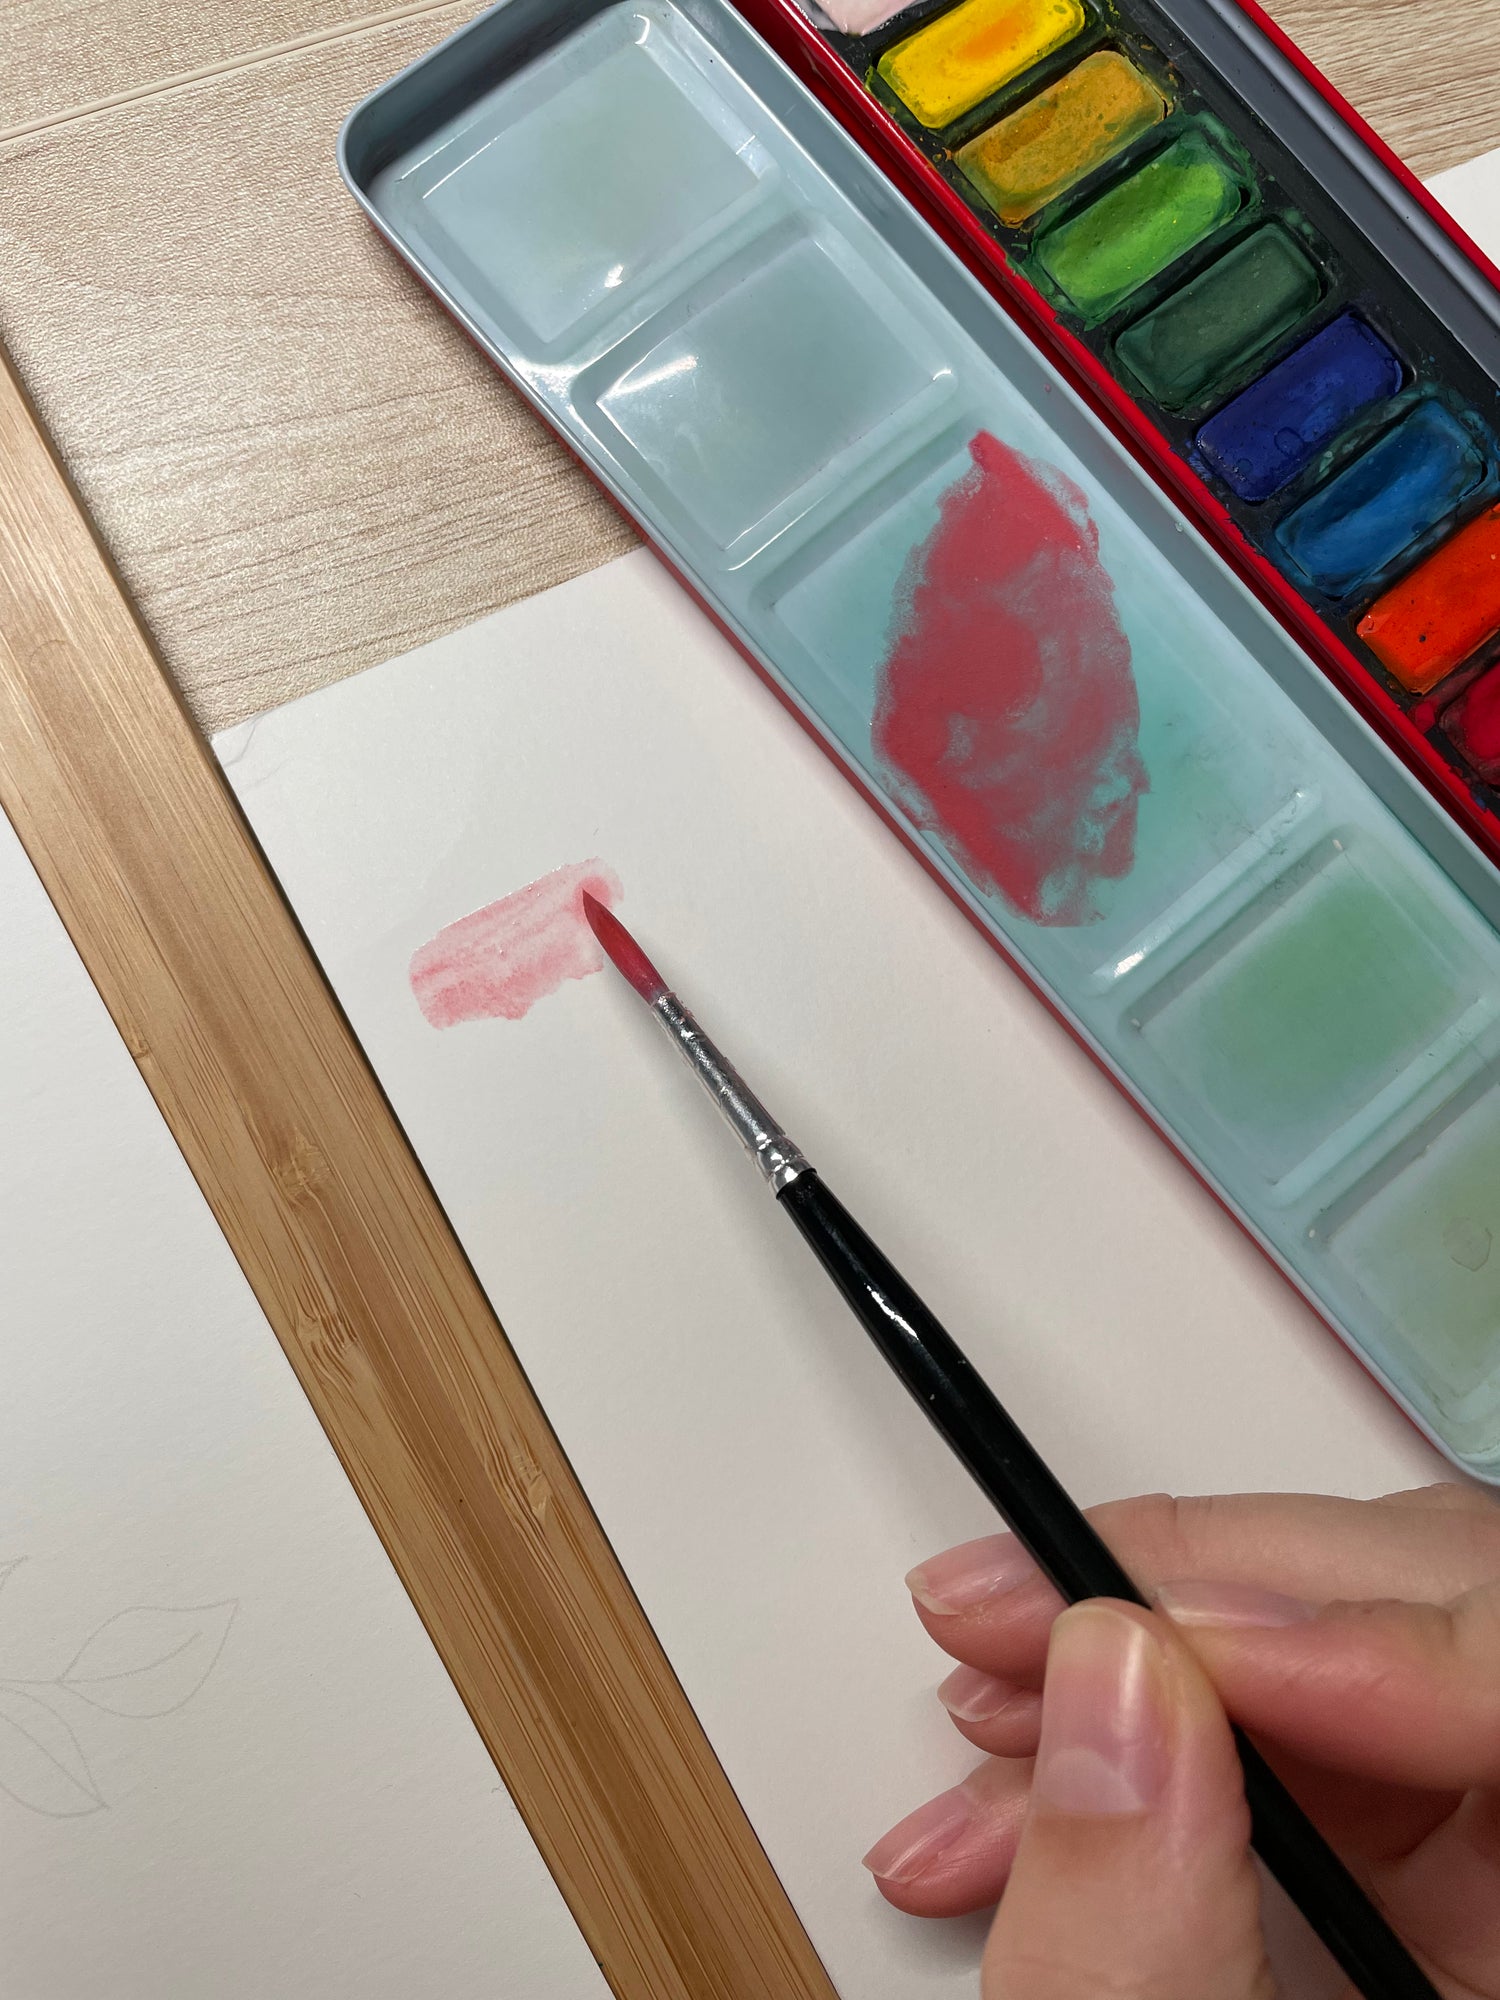
2. Mix the Blush Colour
The lid of your watercolour set is a mixing palette. Using a clean wet brush, create a water puddle in the big section of the mixing palette.
Gently rub your wet brush on the Crimson pan for 5-6 seconds, and transfer the colour to the water puddle.
Repeat with yellow, add the colour to the same water puddle.
Optional: Add white for a more muted look.
Test your blush colour on a scrap piece of paper. Repeat these steps until you have blush colour you're happy with.
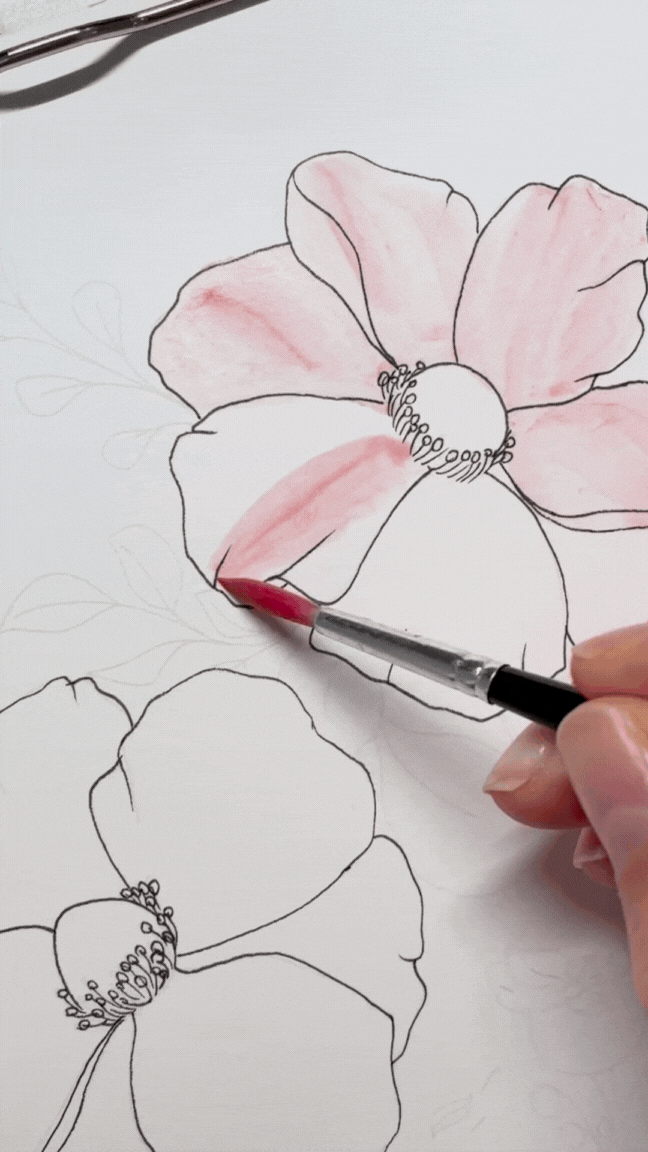
3. Add the base layer
Paint a thin layer of your blush colour on all the flower petals. Work one petal at a time and apply directional strokes (from the edge of the petal towards the stamen). The lines created by the overlapping brushstrokes will create gentle details.
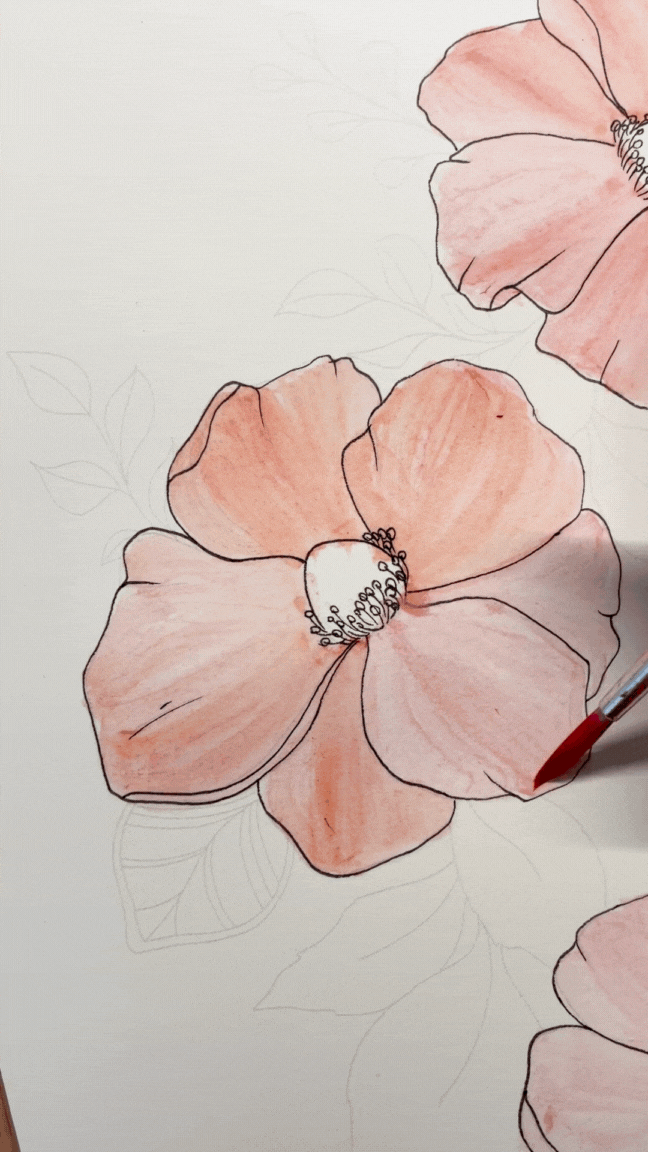
3.2. (Optional step) Glaze the petals
First, ensure the first layer is completely dry. If so, add more yellow to your blush mix and apply a thin layer of paint across all petals to intensify the colour. Use the same directional strokes you practiced earlier.
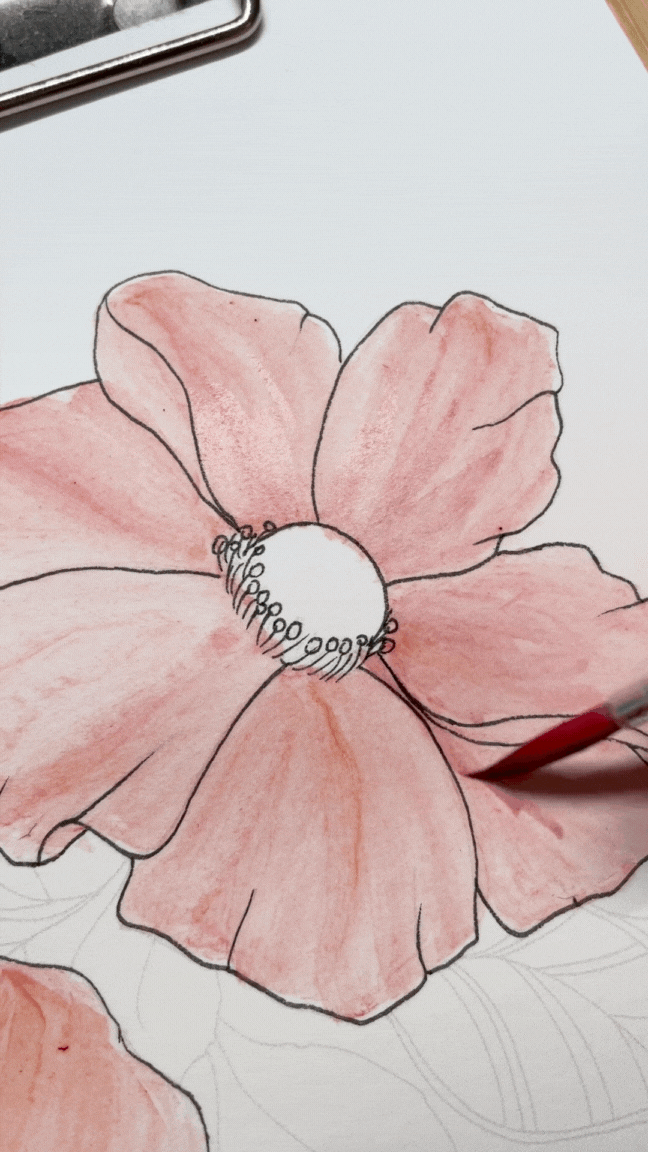
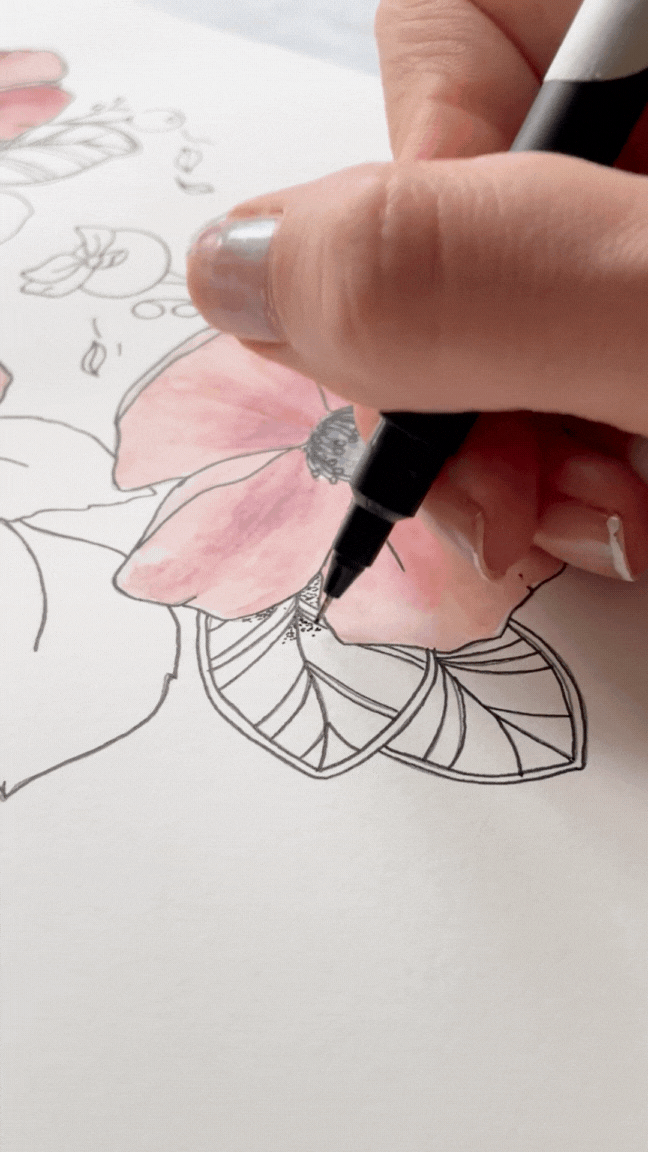
4. Add Details to the Flowers
Mix just a touch of Prussian blue with Crimson to create a warm purple colour. Use this colour to deepen the shadow areas (look for the folded petals). Also add paint near the centre of the flower and pull curved lines towards the edges of the petals.
Remember to work with a transparent colour by adding more water to your brush. It's always better to work in layers to build the colour intensity you like.
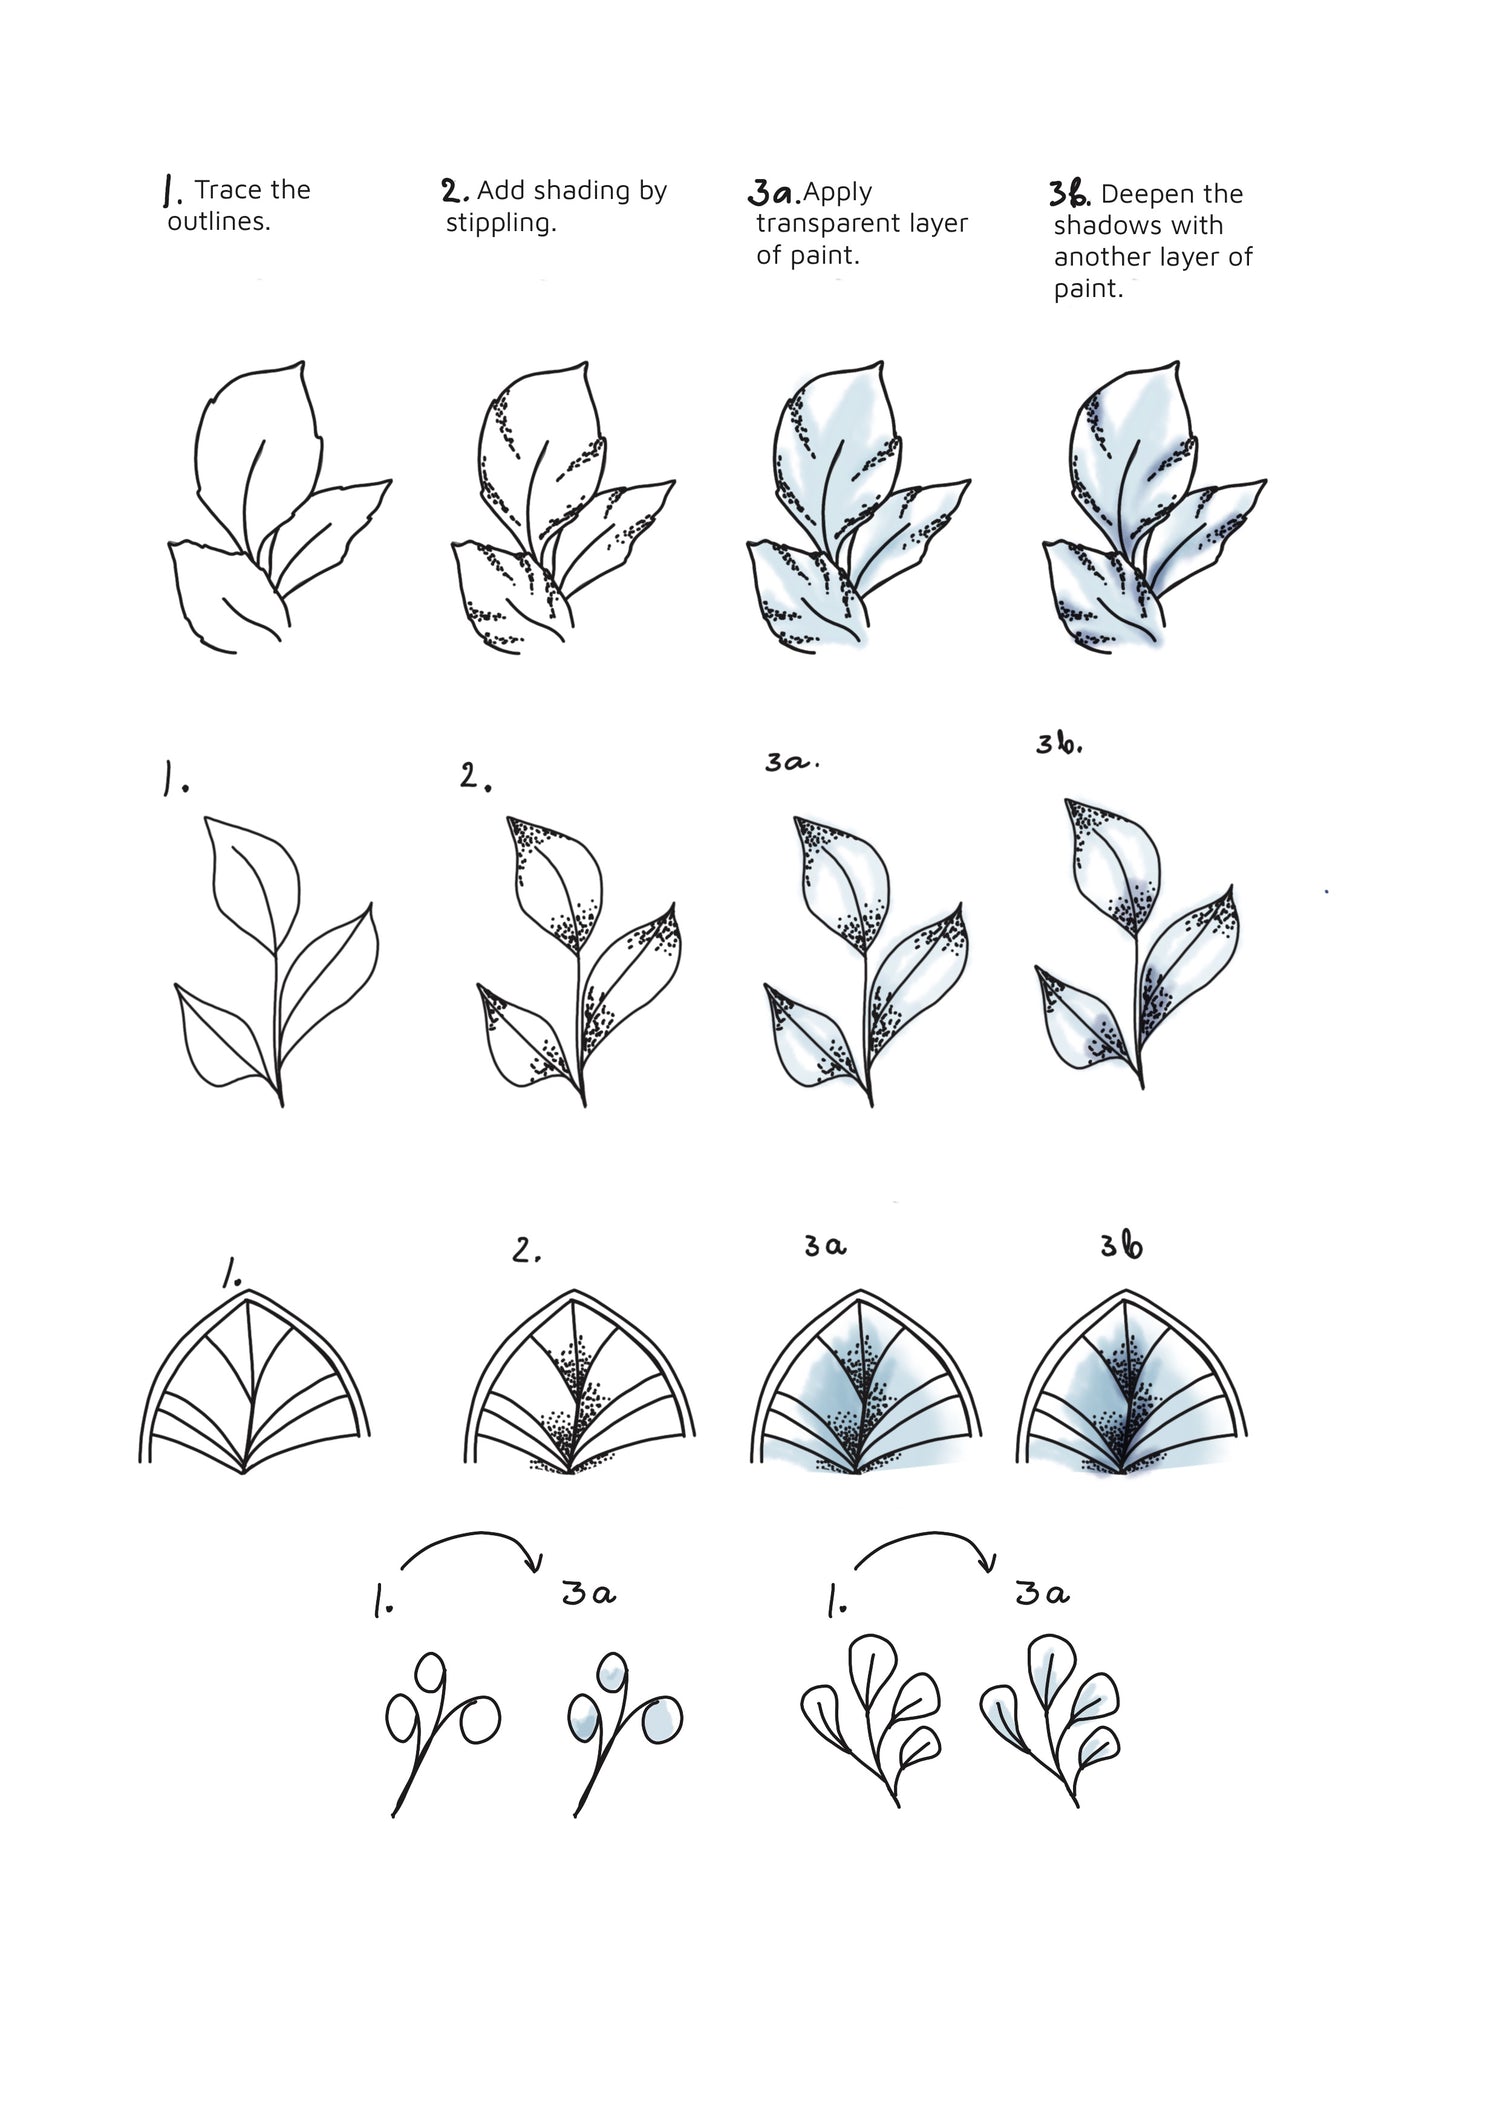
6. Play with the Leaves
Now that you nearly completed the petals, it's time to let them dry and start playing with the leaves. Follow the instruction guide for each type of leaf or let loose and find your own creative groove. Remember to keep them simple since the flowers are the focal points of this artwork.
* (2) Stippling is a technique in which areas of light and shadow are created using dots. For darker areas, apply a greater number of dots and keep them close together. Then for progressively lighter areas, use fewer dots and space them farther apart.
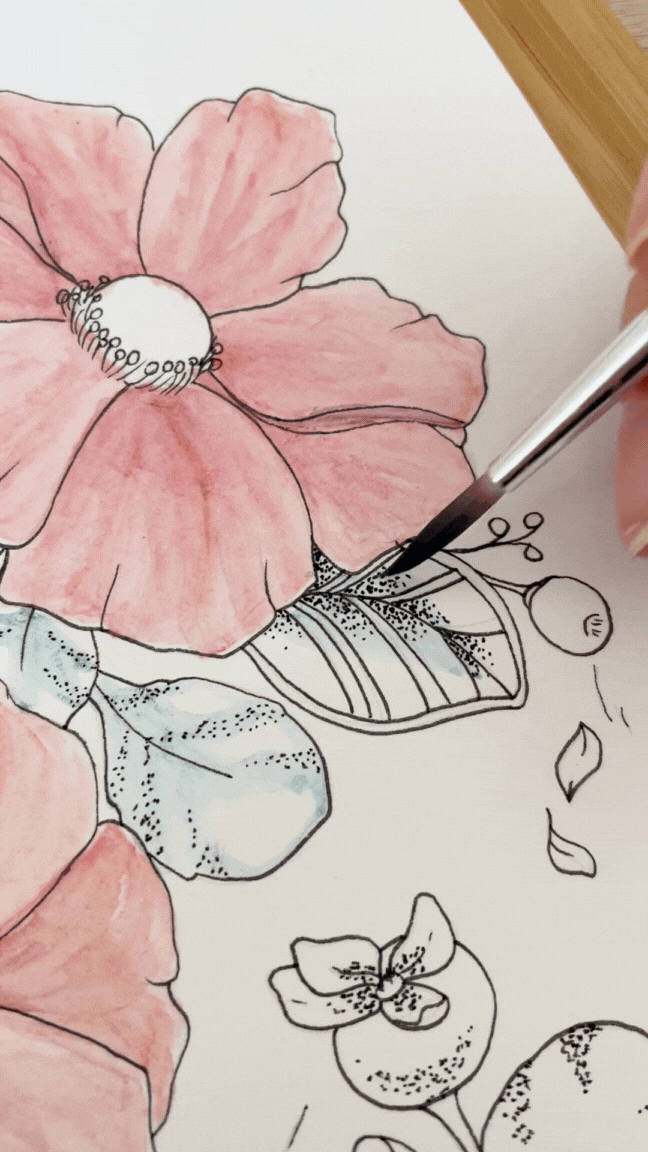
*(3a) Mix Prussian blue with Leaf Green to find a blue-green mix you like. Remember to test your colour mix on scrap piece of paper and work with very transparent paint. Make sure to leave a few white patches, the idea is to add only a suggestion of colour.
* (3b) Add a touch of Crimson to your mix for a more vibrant colour mix. Make sure the previous layer is dry and go only over the areas you've shaded by stippling.
You might notice a few areas we haven't covered in this guide – that's your chance to experiment and make your artwork unique.
Study the completed design below and try to recreate the missing pieces. Or even better - step out of your comfort zone, experiment, and enjoy the creative process.
POV: You simply can't get enough... Use code "EXPLOREMORE"* at checkout to purchase your next design.

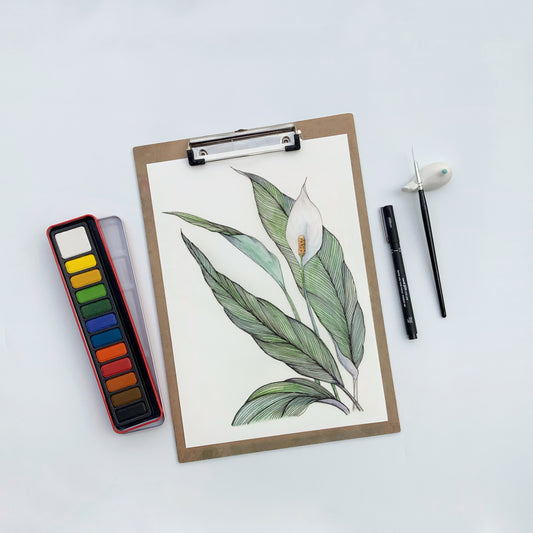
Peace Lily
Watercolour Kits
Watercolours & pen doodles are a brilliant way to loosen up and...
*Unlock a world of creativity with code 'EXPLOREMORE'. We'll only send you the printed design and step-by-step instructions at an incredible price.
Get ready to make a splash!